Step 1: Shipment entry
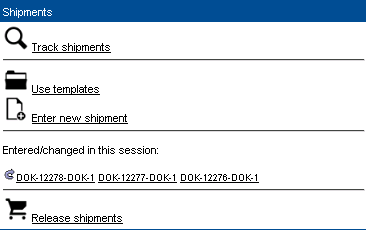
Shipments can be provisionally entered and
then released from the shipment pool. This can then be used as two-stage
shipment entry. To do this, you can save a new shipment as a pool shipment
(field Type) as usual.
Tip:
if necessary, you can receive support to help you work efficiently through
the additional product Shipment template. Please contact Imtech to this
end.
Step 2: Save shipment
Once the shipment has been entered as a pool
shipment, you can save this but also edit it further via the shipment
ID hyperlink. However, the shipment type cannot be retrospectively modified.

Step 3: Release shipments
Next, you can click [Release
shipments].
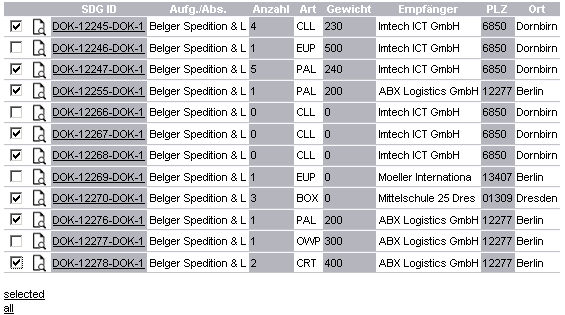
All the shipments in the pool that have not
yet been released are displayed for the configured period. Cancelled shipments
are not included in the table.
You can use the hyperlinks to release all
or only the selected shipments or a single shipment through the shipment
ID hyperlink in the pool.

Furthermore, you can also re-edit the shipment
via the  icon. icon.
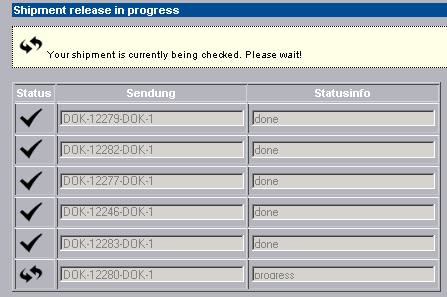
Step 4: Shipment release in progress
As the release process can take several seconds
per shipment, you are shown continual feedback about the status of the
shipment release.

Note:
do not close the browser or press Back to go to the previous page during
the release process as your session ID will become invalid.
Step
5: Shipment release complete
the following options are now available
to you in the final step:
You can click the shipment's
hyperlink to re-edit it
Providing the print
function is enabled in the configuration, you can select [Run
print module] for the shipment or
You can click [All
printouts] to start the successfully released shipments. |  Procedure - Shipment pool